Make Crispy Waffle Iron Hash Browns: A Step-by-Step Guide
Forget the days of greasy, unevenly cooked hash browns clinging to your skillet. Imagine perfectly golden, intensely crispy hash browns with a delightful fluffy interior, all achieved with minimal fuss and surprisingly little oil. The secret weapon? Your trusty waffle iron. This ingenious method, popularized by culinary icons and embraced by home cooks, transforms simple grated potatoes into a breakfast (or anytime) sensation. If you're ready to revolutionize your hash brown game and achieve that coveted crunch without the constant flipping and monitoring, read on.
The Secret to Unbeatable Crispy Hash Browns: Your Waffle Iron
Why is a waffle iron the ultimate tool for hash browns? It's all about direct heat, surface area, and steam. Unlike a traditional frying pan, a waffle iron cooks simultaneously from both sides, ensuring even browning and crispness throughout. The distinct grid pattern creates numerous ridges and pockets, maximizing the crispy exterior while sealing in the tender potato interior. This results in a "hash brown waffle" that boasts a satisfying crunch on the outside and a light, airy texture within, all without drowning in oil. It’s a revelation for anyone seeking that perfect golden-brown finish and an escape from the greasy mess of conventional frying. Plus, the hands-off nature of waffle iron cooking means you can focus on other breakfast delights while your hash browns crisp up beautifully.
Gather Your Ingredients: What You'll Need for Waffle Iron Hash Browns
Crafting the perfect waffle iron hash brown starts with a simple yet carefully selected list of ingredients. The beauty of this recipe lies in its foundational simplicity, allowing you to easily customize it to your taste.
Here’s what you’ll need to make approximately 8 hash browns, serving 4 people in about 45 minutes:
* **Russet Potatoes (2-3 large):** These are the star of the show. Russets are high in starch and low in moisture, making them ideal for achieving that desirable crispy texture.
* **Yellow Onion (1 small):** Adds a subtle sweetness and aromatic depth.
* **Melted Unsalted Butter (4 tablespoons, plus more for brushing):** Butter is crucial for flavor and, perhaps more importantly, for achieving that incredible golden crispness on the waffle iron. Don't skimp!
* **Large Egg (1):** Acts as a binder, helping the grated potatoes and onions hold their shape.
* **All-Purpose Flour (2 tablespoons):** Another binding agent that also contributes to the crispiness.
* **Kosher Salt (1½ teaspoons, plus more for sprinkling):** Enhances all the flavors.
* **Freshly Ground Black Pepper (½ teaspoon):** Adds a touch of spice.
* **Optional Additions for Enhanced Flavor:**
* **Smoked Paprika (½ teaspoon):** For a subtle smoky depth and beautiful color.
* **Garlic Powder (¼ teaspoon):** Aromatic and savory.
* **Fresh Herbs:** Finely chopped chives or parsley can be added for freshness.
* **Cheese:** A tablespoon or two of grated sharp cheddar or Parmesan can be mixed in for a cheesy twist.
Remember, quality ingredients make a difference. Opt for fresh potatoes and good butter for the best results.
Step-by-Step Guide to Perfect Waffle Iron Hash Browns
Creating these crispy delights is straightforward, but a few key techniques will elevate your hash browns from good to absolutely phenomenal.
Preparation is Key: Grating and Drying Potatoes & Onions
1. **Preheat Your Oven and Waffle Iron:** Begin by preheating your oven to 250°F (120°C). Line a baking sheet with parchment paper and place it in the oven; this will be used to keep your hash browns warm as you cook them in batches. Simultaneously, preheat your Belgian or standard waffle iron to medium-high heat. A well-heated iron is essential for immediate crisping.
2. **Grate the Potatoes:** Wash and peel your Russet potatoes. Using a food processor fitted with a grating disk is the quickest method, but a standard box grater works perfectly well. Grate the potatoes directly into a clean kitchen towel or a few layers of cheesecloth.
3. **Squeeze Out Moisture (CRITICAL STEP):** This is arguably the most important step for achieving truly crispy hash browns. Spread the grated potatoes out on the towel. Working quickly, roll the towel up tightly, like a jelly roll. Then, press down firmly over a sink to squeeze out as much moisture as possible. You'll be surprised how much water comes out! The more moisture you remove, the crispier your hash browns will be. Avoid pressing so hard that you mash the potato strands. Transfer the dried potatoes to a large mixing bowl.
4. **Grate and Dry the Onion:** Repeat the grating and moisture-squeezing process for the onion. Grate it into a separate section of the same kitchen towel (or a fresh one), squeeze out the liquid, and add it to the bowl with the potatoes. Removing onion moisture prevents the hash browns from becoming soggy.
Mixing Your Hash Brown Batter
1. **Combine Ingredients:** To the bowl with the dried potatoes and onion, add the melted butter, egg, flour, salt, and pepper. If you're using optional additions like smoked paprika, garlic powder, or herbs, add them now.
2. **Mix Thoroughly:** Using a fork or your hands, mix all the ingredients until everything is well combined. The mixture should be moist but not wet, and the potato strands should be evenly coated.
Cooking to Golden Perfection
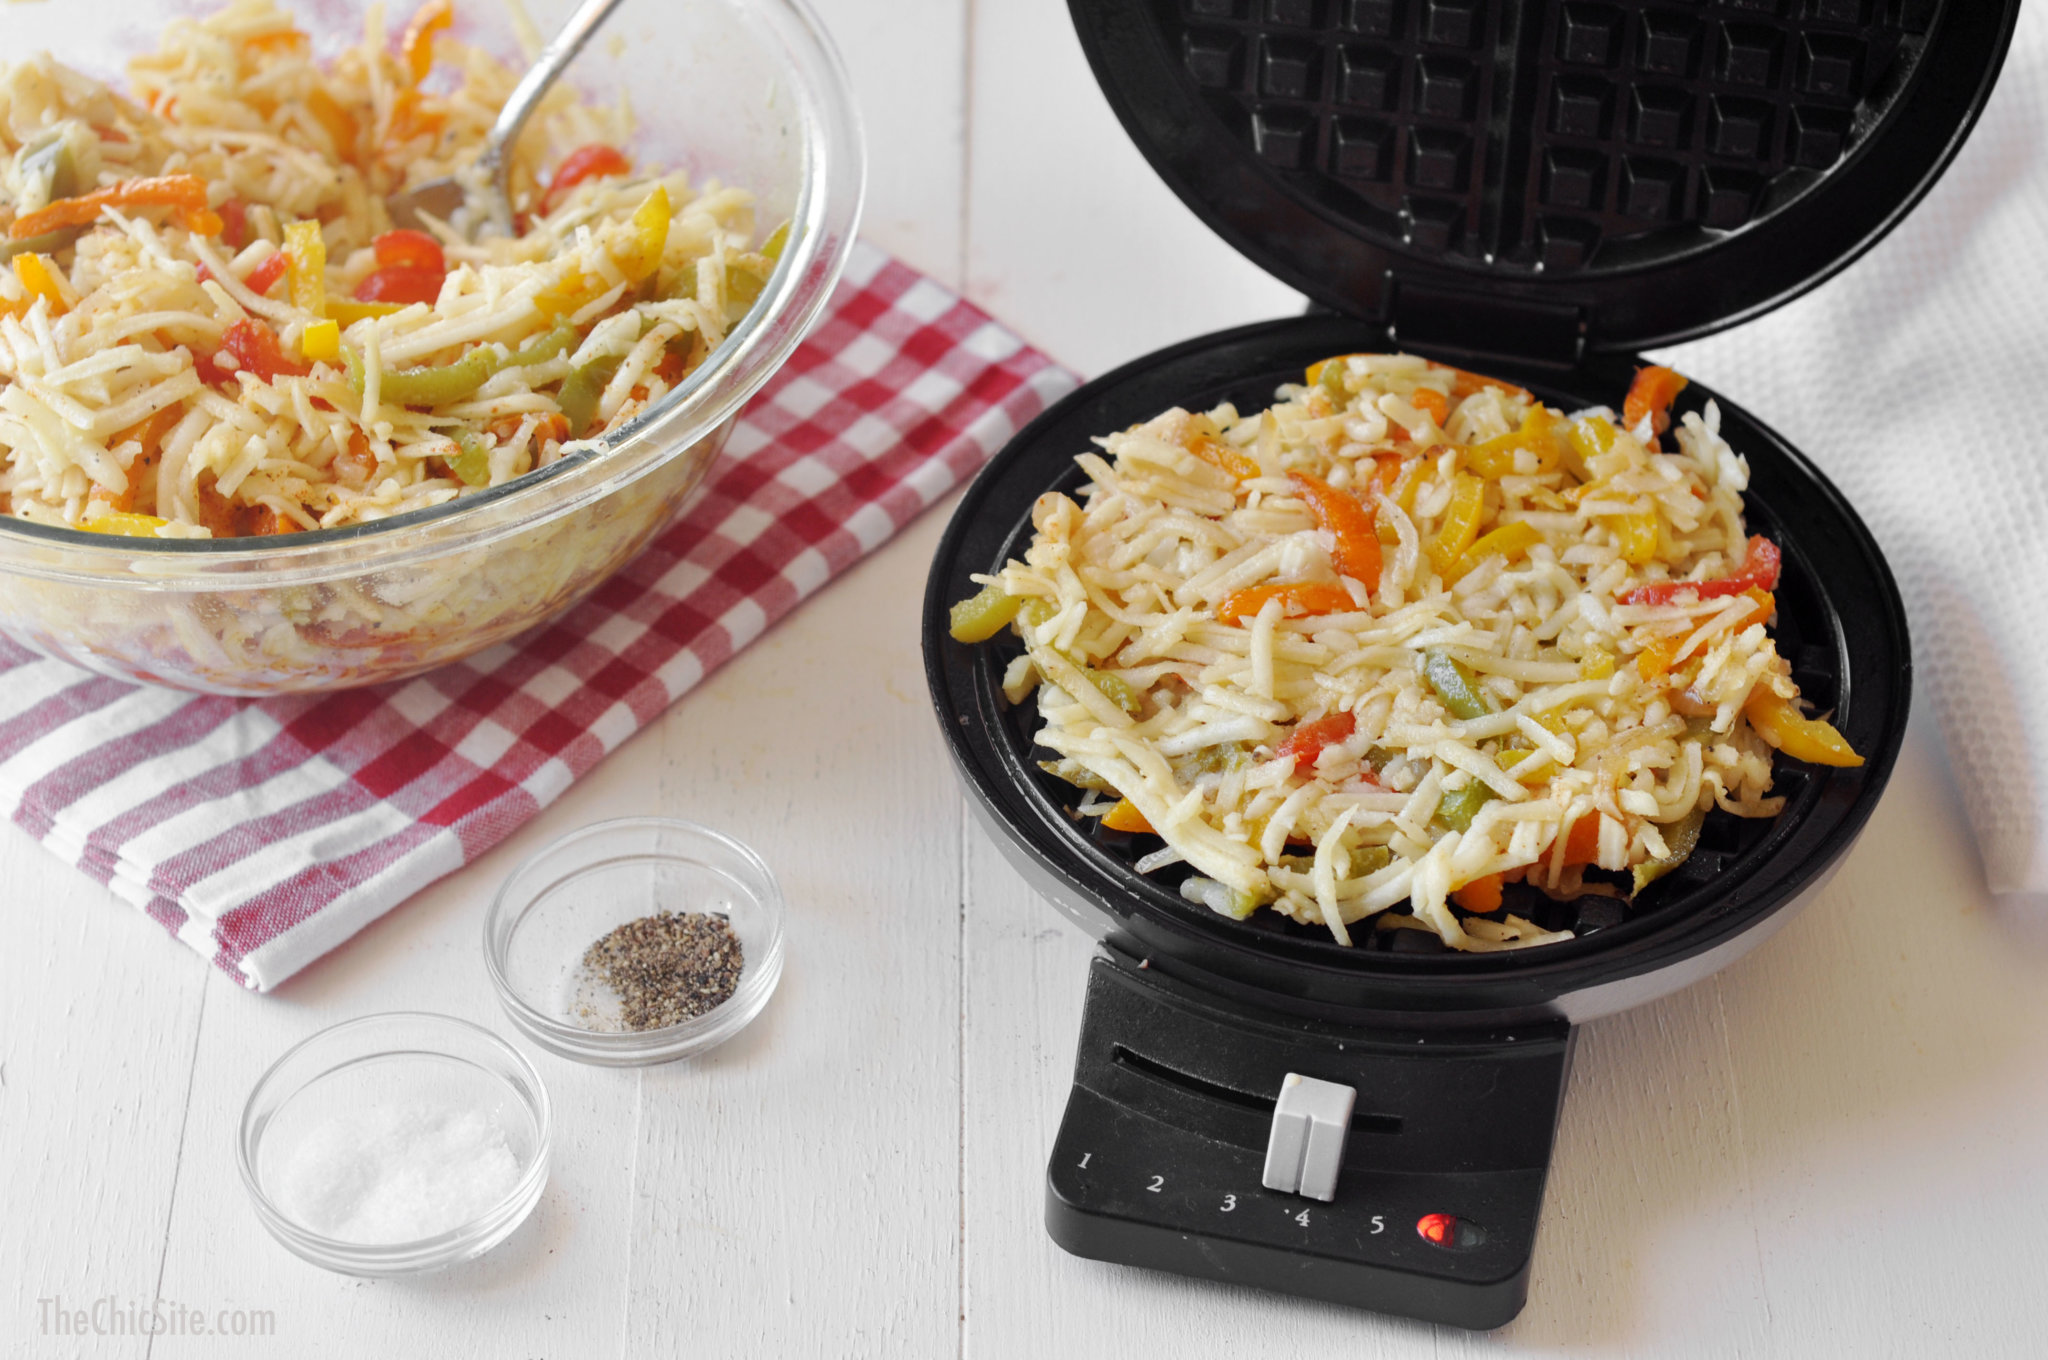
1. **Butter the Waffle Iron:** Once your waffle iron is hot, brush both the top and bottom plates generously with additional melted butter. Don't be shy; this butter contributes significantly to the flavor and crispness.
2. **Portion and Cook:** For most standard waffle irons, a generous ⅓ cup of the potato mixture per waffle division is ideal. Place the mixture onto the hot, buttered plates, spreading it out slightly with a fork to ensure even coverage across the grids.
3. **Cook Until Crispy:** Close the waffle iron and cook for 5 to 10 minutes. The exact time will depend on your waffle iron's wattage and how crispy you like your hash browns. Look for deep golden-brown color and a firm, crispy texture. Resist the urge to open the iron too early, as this can interrupt the cooking process and prevent maximum crispness.
4. **Keep Warm:** Carefully transfer the cooked hash browns, browner side up, to the parchment-lined baking sheet in the preheated oven. This keeps them warm and crispy while you cook the remaining batches.
5. **Repeat:** Continue with the remaining potato mixture, re-buttering the waffle iron generously between batches to ensure each hash brown achieves peak crispness. You should yield about 8 hash browns from this recipe.
Serving and Keeping Warm
Once all your
Ina Garten's Waffle Iron Hash Browns: Crispy Breakfast Side are cooked and kept warm, arrange them on a platter. Sprinkle with a little extra salt right before serving to enhance their flavor and finish. Serve hot with your favorite breakfast accompaniments like eggs, bacon, sausage, or even as a unique side dish for dinner.
Expert Tips for the Ultimate Crispy Experience
Achieving hash brown perfection in your waffle iron is a joyful culinary pursuit. Here are some pro tips to ensure every batch is a resounding success:
* **Don't Fear the Fat (Butter!):** A generous brushing of melted butter on the waffle iron before each batch is non-negotiable. It's key for the golden-brown color and the unparalleled crispy texture. For a unique flavor profile, consider using clarified butter or ghee.
* **The Power of Russets:** While other potatoes can work in a pinch, Russets truly are superior for hash browns. Their high starch content and low moisture are the secret sauce for that internal fluffiness and external crunch.
* **The Squeeze is Supreme:** We can't overstate this: thoroughly squeezing out moisture from your grated potatoes and onions is *the* most crucial step for crispiness. If your hash browns are soggy, excess moisture is almost always the culprit. Aim for the potato shreds to feel quite dry.
* **Don't Overcrowd:** Give your hash browns space to breathe and crisp. Overfilling the waffle iron can lead to steaming rather than browning, resulting in less crispy results. Stick to the recommended ⅓ cup per section.
* **Listen to Your Waffle Iron:** Many modern waffle irons have indicator lights that signal when they're preheated and sometimes even when cooking is complete. Pay attention to these, but also trust your senses: the smell of browning potatoes and the deep golden color are your best guides.
* **Season Beyond Basics:** While salt and pepper are fundamental, don't hesitate to experiment. A pinch of cayenne for heat, a dash of onion powder, or a sprinkle of finely chopped rosemary can elevate your hash browns to new heights.
* **Internal Links for Further Inspiration:** For another take on this delightful dish, explore
Ina Garten's Waffle Iron Hash Browns: Crispy Breakfast Side, renowned for its simple elegance and satisfying results. And if you're specifically looking to achieve that perfect crunch without excess oil, our guide on
Crispy Hash Browns Without the Grease: Use Your Waffle Iron offers further invaluable insights.
* **Serving Suggestions:** Waffle iron hash browns aren't just for breakfast! They make an excellent side for roasted chicken, a base for eggs benedict, or even a unique appetizer topped with sour cream and chives.
Embracing your waffle iron for hash browns is more than just a cooking hack; it's a game-changer for anyone who loves crispy, flavorful potatoes. With a little preparation and these expert tips, you'll be creating perfect, deeply golden hash browns that will impress everyone at your table. So, pull out your waffle iron, gather those Russet potatoes, and get ready to enjoy the crispiest, most satisfying hash browns you’ve ever tasted!